Crafty Tuesday

Well, I spent the day crafting with Birdie #2…and we have some fun stuff but…it didn’t get done in time for today’s CT. So I guess you’ll just have to wait until next week.

Three of the projects we accomplished today are for upcoming birthdays, though. It feels good to be ahead of the game for a change. Especially since we are going to be gone for an entire week in a mere two weeks.

OH?! Didn’t I mention where we are going? Well, see for yourself…

EEEEEEEeeeeee!!!

Yes, we are taking a Disney cruise! Add it to the list of perks at Daddy’s Disney job – we get to go be the guinea pigs for the one of the first sailings. We are headed to St. Maarten, St. Thomas and Castaway Cay. I have been trying not to get too excited about it because it seemed so far off and we have SO MUCH TO DO before we go. But, now? It is only 2 weeks away. NOW, I’m excited.

So the next few weeks I may have a Crafty Tuesday as we prep for birthdays and vacation, but for a few weeks in March you can expect radio silence from around here because I will be in the middle of the Caribbean. Thank you, Uncle Walt.

Crafty Tuesday

We had a productive/crafty weekend around here…finally!

First up, we got around to switching out some lighting around ye ‘ol house. I was positively giddy on Saturday after our new friend Mike hung four different fixtures and put in a bunch of dimmer switches for me.

My mostest, favoritest, bestest new fixture is the kitchen. It is so very pretty.

DSC_0040-2

See the old fixture there in the foreground. Blech…but look at the new shiny pretty one! It has an Edison filament bulb in it, which regrettably doesn’t give off much light, but I don’t care. It really looks so nice. Let’s look again from another angle, shall we?

It is my favorite room, but I think the award for the biggest change goes to the dining room. This is the um…chandelier (?) that we had before. It is brass/glass/out-dated and just a little too busy for our room. As you can see…we have a lot of architecture and details, we needed simple – but a lot of light because it is a huge room.

DSC_0032-2

And so we found this one. Love.

I’ll have to take a better shot of it tomorrow…but trust me, it is a huge improvement. Simple, elegant – goes with the style of the house with a bit of a modern twist. Love, love, love it!

But, enough with the house stuff…it is Valentine’s Day after all!

Thankfully the girls both wanted the same valentines for school…and I got a free download over here – plus they were simple assembly. Score all around.

DSC_0055

I also “borrowed” this idea that I found on Pinterest and made these little Valentine candles for our mantle.

DSC_0068

I didn’t have a book that I could sacrifice, so I used some scrapbook paper that worked just as well. I’ll light them tonight for our romantic dinner-in with the girlies. ;-)

DSC_0070

And I put together a birthday gift this weekend. My sewing machine was so happy to see me (and I was just as excited to visit it!).

This is for our sweet little Elizabeth who turned 3 last week! It is a placemat…

DSC_0064

Flip it over, it is a chalkboard mat…

DSC_0063

And roll it up, it is portable for fun on the go…

DSC_0066

I’m not going to promise anything, but I might be making more of these, so maybe I can take photos and tutorial it soon. (Again…no promises!)

And with that…I’m off to some more house projects! What crafty goodness do you have for us this week?

Crafty Tuesday

Thwarted again! This week I missed out on the fabric run in downtown LA’s fabric district because I was sick! I had my list of fabric I need – no, really! I do need some fabric, although after cleaning out the stacks of fabric and moving it up to the sewing room, I’m pretty sure I’ll have a hard time convincing anyone that I need anything. But, I do need some fabric for the roman shades I’m dreaming up for the bathrooms and kitchen. I have all the supplies – and hopefully I can find what I need this week.

Meanwhile, I’ve been pinning stuff on Pinterest like crazy, but haven’t actually done any of it. I have so many ideas for Valentine’s day…I gotta get started. And my house project to-do list just continues to grow. I think it is so large right now that I’m thoroughly overwhelmed. Every room needs paint, some sort of furniture, new flooring or rugs, LIGHTING…it is just too much. So I’m trying to tackle the “little things” – things that not many people would even notice, but I do and it makes me feel like I’m making some sort of progress. Things like – cleaned out linen closets, re-populating photo frames with new pics, culling our book collections and spreading the stacks out throughout the house. All things that seem to take a few hours…but I notice it when I walk in the room.

Oh…I do have one thing to share – a most excellent recipe! After many, many years I finally realized that J. would really much rather have cheesecake than real cake for his birthday. (I think I just couldn’t believe that there are people who wouldn’t like a big piece of chocolate cake on their birthday!) So, I have on occasion made the quick, no-bake cheesecakes for him – or grabbed one from the Cheesecake Factory. See, I am not a fan of cheesecakes – eh. I can take it or leave it and would usually just leave it. But then I found this recipe for Company Cheesecake.

DSC_0014

Oh my.  You guys…I might have to make it for my birthday now. It.Is.AMAZING.  We had chocolate, berries and homemade whipped cream to douse it with…but it doesn’t need a thing. It is delicious. It has pecan crust – instead of graham crackers. Mmmm…it is so good. It is a little time-consuming and I’ve found a bunch of ways to try to not get any “cracks” in the top that I’ll file away for next time.

Oh, there most certainly will be a next time!

DSC_0028

Crafty Tuesday

I am probably (as you read this, even!) on my way over to Birdie #2′s craft area to CRAFT this fine Tuesday morning. I have two supercapes and some Brownie t-shirts that have to get done today. I also have a list of house projects that I’m itching to get started on, so we’ll see what goodies we can conjure up for next week.

This past week, I just finished handing out a few more Christmas presents. Again with the stationery. Apparently when I find something that works, I tend to stick with it. But this time we have cute little caricatures (ideas slightly borrowed from Sarah & Abraham) adorning our notecards.

Alexander:

DSC_0083

Elizabeth:

DSC_0085

And a little something for Julie:

DSC_0084

Julie was actually the one who turned me onto these little stickers that you can use as gift-tags, so naturally it was appropriate that I make my first batch for her darling little ones.

DSC_0087

All of these were designed/drawn in Illustrator – and kinda even look like A & E, if I do say so myself – they are indeed incredibly adorable and sweet, just like these little guys! And then I just ink-jet printed them out onto nice cardstock with matching envelopes from my favorite place, Paper Source. The labels are printed out onto 8.5″ x 11″ full sheet adhesive paper.

They are kind of simple gifts but because they are individualized – they are usually a really big hit.

Crafty Tuesday

Yeah! I have a few possible joiners for our Snapshot Sunday! So now we know Sundays and Tuesdays, at the very least, you can count on something being up here.

Although this week, we are grasping a little bit in the crafty department again. I completed another set of Princesses for a birthday and am working on 2 more sets and…a boy version, so stay tuned for that.

I finally got the calendar back from the printer and mailed them the last week of December, so I think most people got them on January 2nd…not too late. If you would like, you can see the whole year by clicking on the cover below.

cover

And Birdie #2 was kind enough to snap these photos of the signs I made (I totally forgot to snap photos of these before the handoff.) for her studio area, which by the way, when she gets her area straightened back up, I so need to go take photos of it. She turned her garage into the coolest crafting area, ever!

This has become our mantra since I found it on Pinterest many moons ago. We tell each other “We can do hard things” at least once a week.

photo

And I just saw this, (I think on Pinterest too!) and loved it – so she got 2 signs.

photo(1)

I followed Young House Love‘s subway art tutorial, sort of.  J. cut the plywood for me and I painted it white; designed the signs in Illustrator and cut them out; used my distressing kit from back in my scrapbooking days to roughen the paper up a little; and then just modge-podged it on to the plywood. I think next time I might use the matte modge podge, since this has a little more shine than I’d like and not apply it so thick. But of course, last-minute Betty over here didn’t have time to go back and fix the glitches. Literally, I was wishing it dry so I could wrap it up to take it over to our New Year’s Party!

I’m actually off to the fabric store right now – I have some super capes to whip up and a totebag for Ad’s classroom. So I will have honest-to-goodness crafts for next week. See you then.

Crafty Tuesday

Ok, I get it. You are all chickens! Nobody wants to suggest any resolutions for me? Fine. I’m working on a 2012 To-Do List – not quite resolutions, but I am going to make a list of things I’d like to accomplish this year. It is a’ brewing up in my little brain. Stay tuned.

I have a few Christmas projects that I did manage to get out the door this week. Yes, it was the week after Christmas, thankfully we didn’t celebrate with friends until New Year’s Eve.

I whipped out the ol’ stationery and made some custom cards for everyone. Colored paper from Paper Source, designed in Illustrator and printed out on our trusty inkjet printer.

MC – our superstar soccer playing babysitter…

DSC_0011

Yvette – Who just went en pointe this year and therefore is Addie’s ballet idol…

DSC_0015

Charile – Our lil’ guy who always entertains his little harem of women…

DSC_0016

Diane – my dear friend and hair stylist extraordinaire…

DSC_0013

and Jamie – we decided her “logo” needed to be a beehive with her family of busy bees, so this is what I came up with…

DSC_0019

Then for Audrey (and I made one for Sasserella Ella for her birthday that was this week, too!) I finally got to make one of these Box O’ Princesses. I’ve been dying to make one of these – I love that it is all the Disney princesses but homemade…no manufactured in China plastic here.

DSC_0005

DSC_0008

I won’t detail out the process, since you can see it for yourself at her site, but it is so fun to do – if you have a princess-lovin’ girl in your world you should try this out.

That’s it for us around here. I also made some signs for Birdie #2, but totally forgot to take pics of them! I’ll get some pics and let you know how we did them next week. In the meantime, I’m enjoying have J. home this week. We are knocking some great projects off around the house and heading to Disneyland today, so we’ll be back soon.

Crafty Tuesday ~ Etching Glass Edition!

Hello there…we have a bit of a Christmas hangover around here, so moving slowly.

I had many questions about the glass etching that the Birdies attempted a few weeks ago, so I thought as I was finishing up Christmas gifts last night (um, yes…the day AFTER Christmas) I would snap some photos and show you how we did our glass etching. And trying to take photos in our house at night just solidified our quest for new lighting…that is on the menu for next week while Daddy is home. Apologies for the not so great photography yet again. Perhaps if I actually crafted in the daytime it would be a nice change, huh?

So for glass etching…it all begins on the computer. Using the software that came with Eva (our Silhouette machine) I design what we want etched.

DSC_0266

And then we plug in Eva and let her do her magic. Cut out the designs on adhesive vinyl, by the way – this is a good way to use up any scraps of vinyl you have, although I did a lot of etching last night so I stacked all my designs into one sheet.

DSC_0268

While your vinyl is cutting out, wash and dry your glassware. It is really important to not get any oils from your fingers where you want to etch, the etching cream doesn’t stick to the glass if it is dirty.

DSC_0270

When your vinyl is cut and glassware is clean, you start “weeding” out the design. You essentially want to remove the vinyl anywhere you want etched. It is very handy to have a dental pick for this step.

DSC_0273

In this one – the black parts are where the glass will be protected, and the white parts will be etched. I wanted the “V” to be glass, but an etched circle around it, and another etched, larger ring around the circle.

DSC_0275

Once you have your designs weeded, you’ll need to use transfer tape, which is clear tape you put over the top of the design that allows you to transfer your design to the glass. We used painter’s tape as a guide so that all of our designs on the wineglass set would be even. Putting a piece of tape at the rim of the glass, I then lined the top of my ring up with the bottom of the piece of tape. It is a sort of inexact measurement, but it works.

DSC_0278


While you still have the transfer tape on the glass, (remember no fingers on the glass!) rub down the design really well. I mean, REALLY WELL. Especially around the edges, using something like a credit card, make sure the edges are really adhered otherwise you will have some bleeding from the design. Carefully peel off the transfer tape, and then you are ready to etch.

This is the etching cream we have been using. It is kinda toxic and has a million warnings all over it, it is essentially acid that eats glass, so yeah…be careful with it.

DSC_0281

I also like to surround my edges of adhesive with painter’s tape too…just to be safe since I’m a little bit of a sloppy painter. Apply a nice, even sort of thick application to the open vinyl areas.

DSC_0282

If you can lie your piece down, it helps with the running of the cream. This obviously isn’t always ideal since glasses are round and like to roll, but if you can prop it up like so, it definitely helps.

DSC_0283

Let the cream sit for 10-15 minutes and then wash off with warm water. For stronger glass you might want to leave it on longer, I left it on some glass ornaments I did for 30 minutes and it still didn’t etch as well as the wineglasses did. You might need to experiment…get extra glasses!

And…voila! Handmade, personalized gifts that you’ll want to keep yourself!

(This one is for our friends who make amazing lemon drops!)

DSC_0286

DSC_0289

DSC_0287

Let me know if you try to etch some glass! We’d love to see your creations, too!

Crafty Tuesday

I just took a break from sewing the buttons on my little gift card purses so I could pop in here for a bit of Crafty Tuesday. I have some last little bits to finish on the purses (they really are coming…this week, Aunt Laura!) and I snapped some photos as I was putting a few together so I can throw a little tutorial up for anyone who might need to put a few of these together for Christmas cards. I’ll shoot for getting that up for CT next week, so stay tuned.

We do have some other gifts today. My friend and I wanted to give all of our fantastic scone bakers and coffee sellers (from our First Friday Coffee fundraiser at school) a little something and we decided to treat them to a cup of coffee. So I rustled up some coffee cozys and we are going to put a Sbux gift card in each of them.

DSC_0203

I used up a bunch of sweater scraps that I had from gifts last year and of course brought back my very favorite chalkboard fabric! I didn’t really embellish them besides the chalkboard fabric and a few of the pieces were just a little bit short so I ended up making a wrap with a button to keep it fastened around the cup. It works just fine and also used up some of my hair elastics that break whenever I try to put too much hair into them.

DSC_0206

And for some sweet tasting gifts. Addie and I made these little mini pies in jars for Thanksgiving! We brought some over to our neighbors for dessert.

DSC_0018

J. and I just put two in the oven the other night to warm the apple goodness all up and in five minutes, yum….our very own personal little pies.

DSC_0017

I especially like that it is just enough pie to make you feel like you had something, but not too much…good portion control. Although in hindsight we should have spent more time looking for the shorter jars, ours were skinny and tall and kind of hard to get the crust down to the bottom. But I made little tags for the tops and tied a little twine around it and good to go as cute little gifts!

DSC_0020

Filing that away as good little gifts to give…or keep.

I also need to find a way to file these little leaves away and keep them. We started a tradition this year by writing three things we are thankful for on these leaves we sort of freehand cut, about five minutes before dinner. Then the girls took turns reading them out loud (you can watch it here if you really want to see/hear them!). I am thinking I need to get a “Thankful” book, one that we can add to each year. For now the leaves are spread out on our dining room table, along with all the other projects we have brewing.

DSC_0199

Do you all have some Thanksgiving goodies to share, or have you already left November in the dust and are on to Christmas, glorious Christmas crafts?!

Crafty Tuesday

Nope. Very little to share, I’m afraid. I have, however, lugged all of my sewing room upstairs for Addie’s old room is now my new sewing room. The bunkbeds and sharing a room seems to be sticking and the girls are still going strong on the roommate thing, so the other room is going to be a terrific place to leave my sewing all out. And it is ready…just not much crafty going on…yet.

I have been mending, fixing holes in jeans, putting in new elastic in pants, darning ballet sweaters, taking in choir robes, and trying to finish up some of those little gift card wallets. (They are coming, Aunt Laura – I promise!) And now those little things are almost done, hopefully I can start on some Christmas gifts.

I did, however, (as I might have mentioned here, or over on Facebook, or at least 20 times to different friends over the course of today) finish my Christmas cards! I’ll give you a sneak peek…I don’t think it’ll give too much away. This is one of the shots from the photo shoot over the weekend.

DSC_0054

I love those two. They helped me make pumpkin whoopie pies to take to our neighborhood block party on Sunday.

DSC_0078

I forgot to take a photo of the finished product! But the recipe came from over here. They were good, but with all things I seem to make, I’ll do a few things differently the next go-round.

Addie is loving the missing cabinet, as is her Mama. Now she can sit right up on the counter while helping bake.

DSC_0080

And the light. The beautiful, beautiful light we now get.

DSC_0081

I’m still going back and forth on the paint colors for the cabinets. I’m going to have my design posse over for coffee after Thanksgiving and hopefully have one of the old cabinet doors painted with some examples so we can make a final decision. That is our Christmas vacation project. But thanks so much for all of the paint advice and opinions!

Tomorrow I’m going to paint up the ceiling. Our gaping hole the cabinet left is filled in, spackled and sanded. It is getting there. Just ever so slowly.

Tell me are you getting some crafting on lately? Christmas gifts or house projects?

Crafty Tuesday

I’ve caught a little bit of the Halloween/Fall decor bug, all thanks to Aunt Vicki. She sent me an email with a great blog that I’d never seen before. Which led to a few more blogs that I’m now obsessed with and so now I’m heading down this Halloween decorating path, and honestly…Halloween is my least favorite holiday. Imagine when Christmas hits.

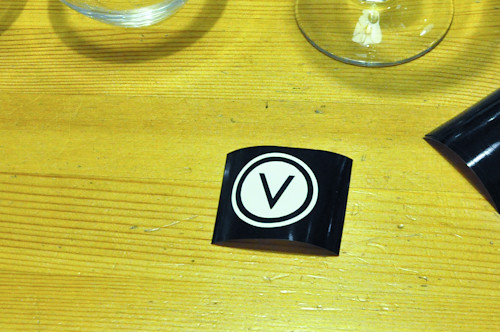
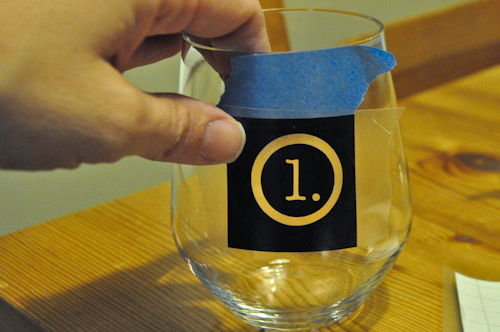
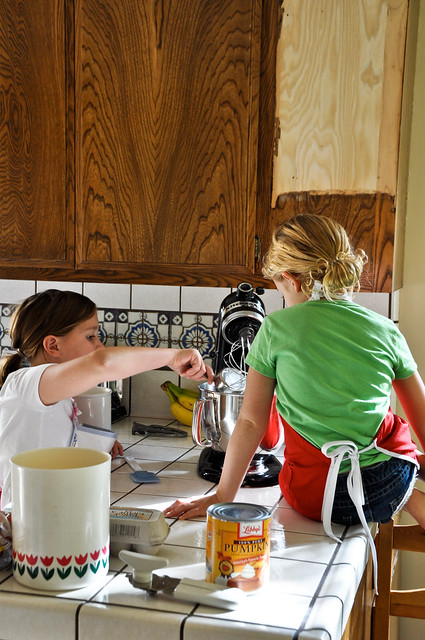
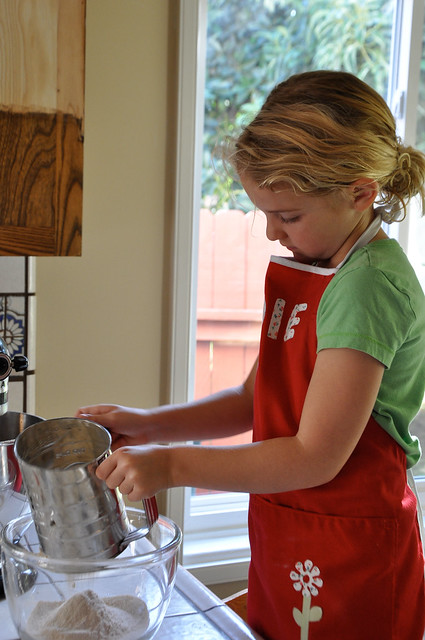
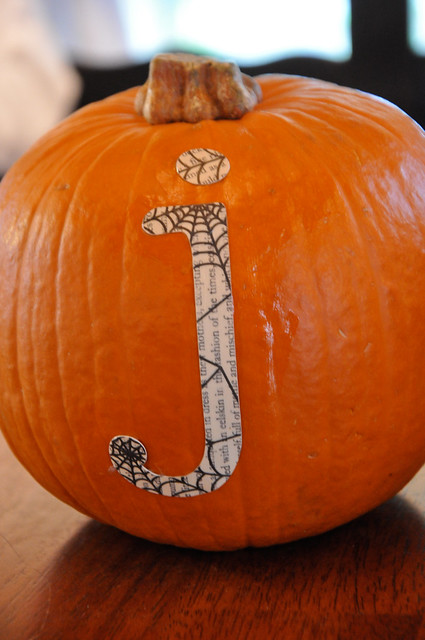
So, we made little mini monogrammed pumpkins inspired by Brown Paper Packages (LOVE her blog name!) today for our mantle…

DSC_0025

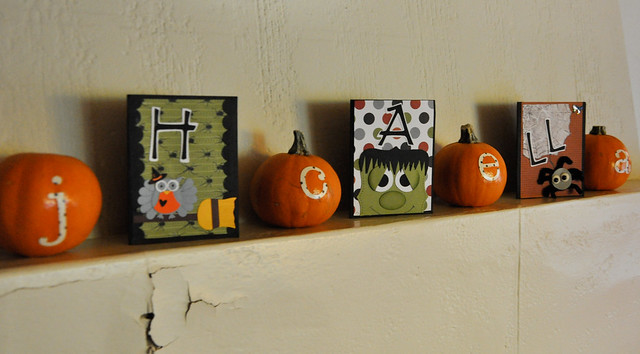
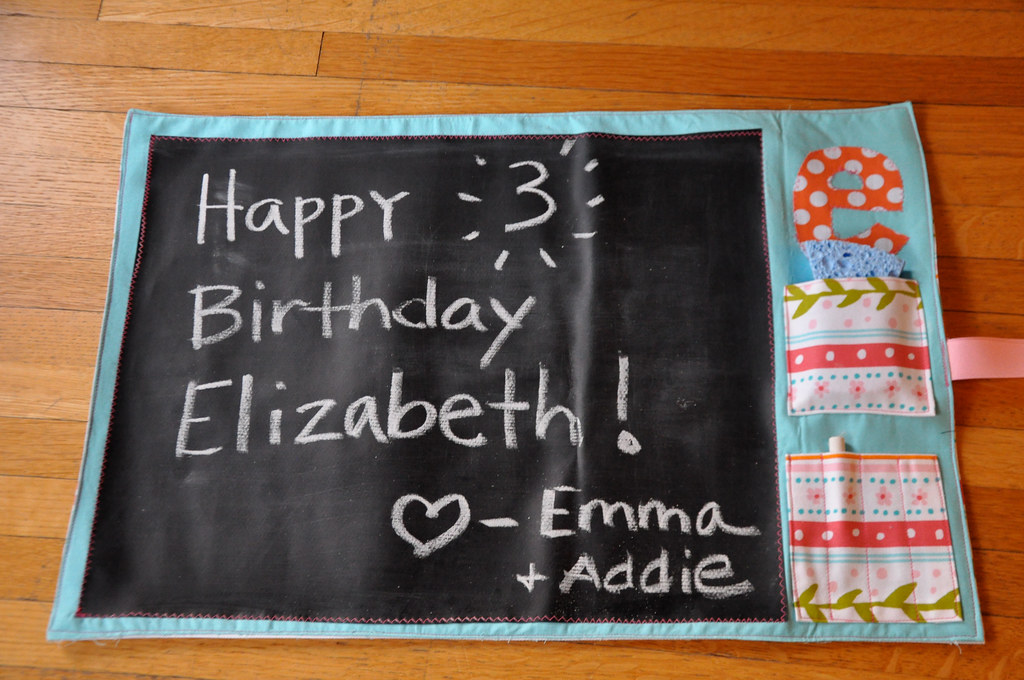
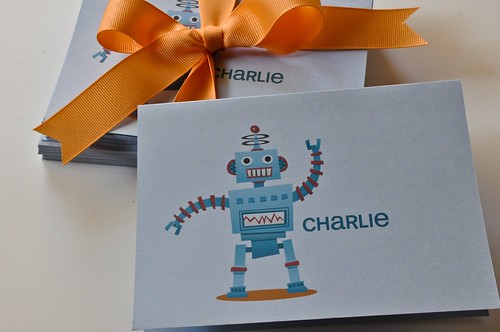
See Nana’s handiwork in between the pumpkins? We’ve been getting a card every few days for the past two weeks. The big question before the last card was, will it spell “Happy Halloween” or just “Halloween?” Very clever, no? I have a great idea for the cards when we get the final piece of the puzzle. I am so in love with the “A” one. The Frankenstein is just too much.

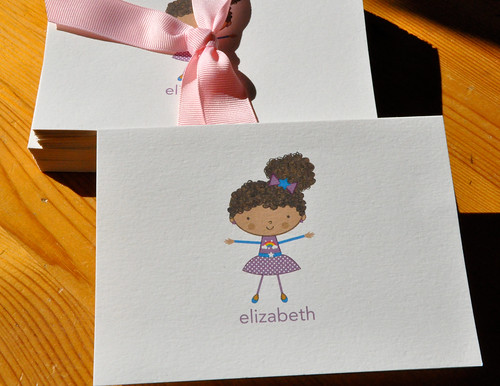
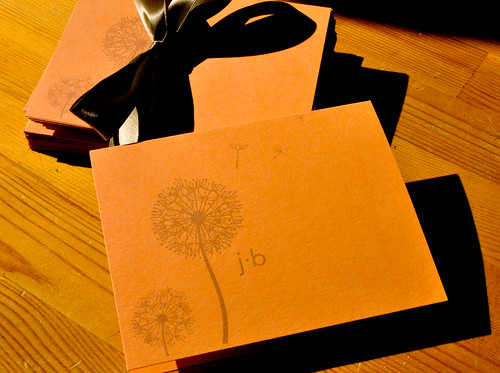
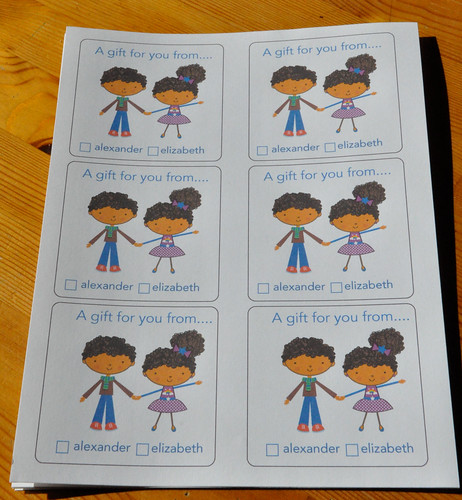
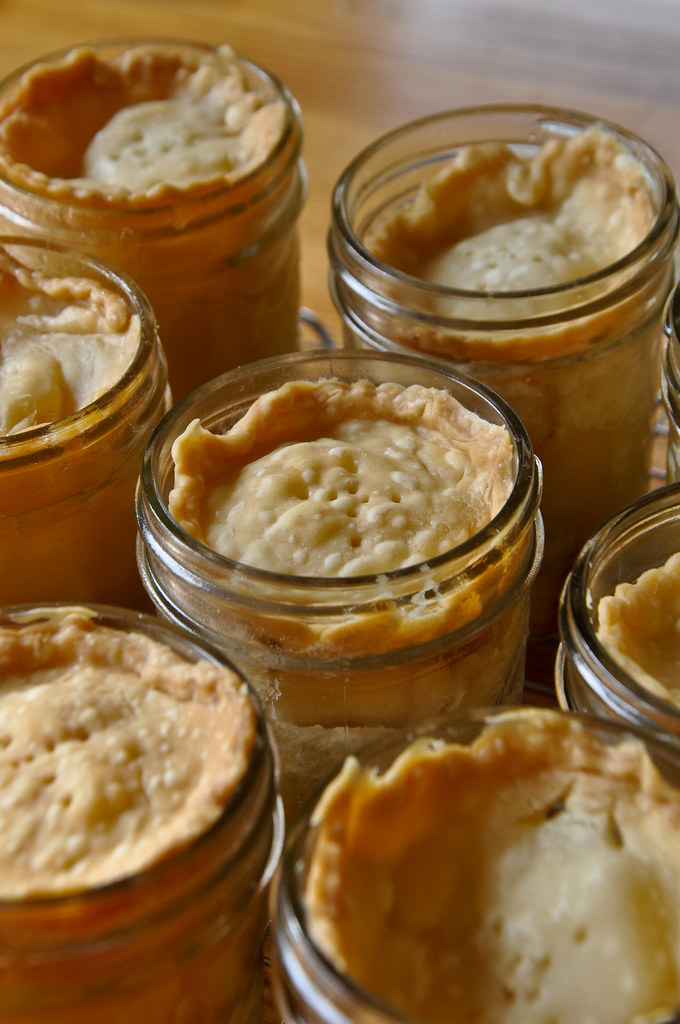
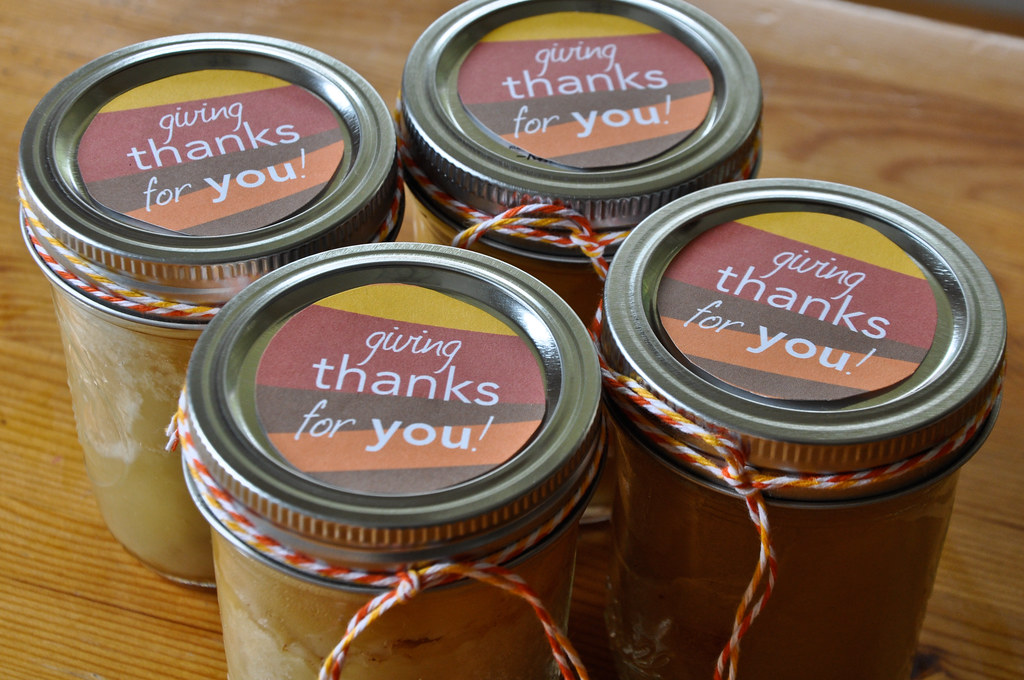
Anyhow, yes. We did little pumpkins for us, and a few others for the neighbor girls, and still a few others to give away as gifts.

DSC_0030

And then, I stupidly showed these ridiculously cute bats to Ad’s teacher. Uh huh. As you might have guessed, we made bats in Ad’s class last week. 30 bats later (I didn’t get a photo of all of them!!), I still have hot glue burns on my thumbs, but they were a definite hit. Such a cute idea.


(Photo Credit: BabyCenter – Click for instructions)

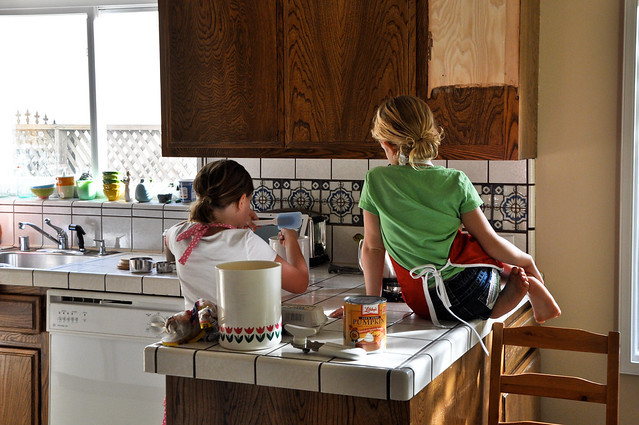
And other than those little guys, I’ve been doing a lot of house stuff. Like painting trim (yeah!) in the kitchen and a bunch of little stuff that nobody else will even notice, but I notice it all, so therefore it is very important.

I’m getting closer to prepping the cupboards to paint. But it is such a huge job that I keep putting it off. Well, that is not entirely true. The real reason is – I’ve been on Pinterest looking at ideas for the kitchen. Specifically, what colors to paint the cabinets. I have a few friends that are pulling for that really cool light green color. If you look really closely in our tile, there is a slight green outline that the cabinets could pick up.

DSC_0004

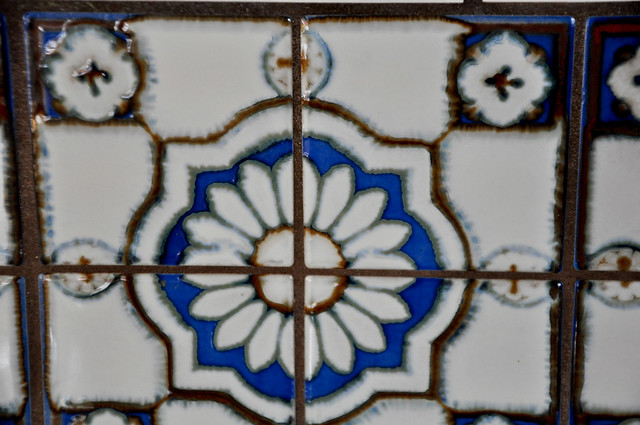
Well…you can’t really see it well in this photo, but it is there. And if we painted the cabinets a lovely green like this…you could really see it.

From jasdesignbuild.com

Oh, I love that green. And I’ve always loved just white cabinets, but I am a little worried that it will be too much white in there. But oh…look at this beautiful kitchen…(with my green in the BACK of the cabinets!)

From shorelychic.blogspot.com

And this one… (Yes, I realize that white cabinets is not going to make my kitchen look like this. But oh, is it pretty! Totally impractical with ALL of those windowed cabinets. Where do you hide your stuff? But, again. Oh.So.Pretty.)

From cococozy.com

This one?


From traditionalhome.com

So this one was interesting because I was drifting into a creamy, not-so-white color. Which has been our dilemma with the trim color around here. We have a Spanish-style, old house. It deserves/needs antique-ish colored whites. I’m still looking for a good one for the upstairs trim. So maybe an off-white color like this above would look good? But with the tile?

Then we were watching Modern Family the other night and I almost fell off the sofa. First of all, if you’re not watching this show…you must start. Now! It is the funniest show. I am convinced the Clare and Phil are J. and I. At least once every episode I look at J. in disbelief. “Seriously? Are they just hanging out trolling for material in our house? That is us!”

But I digress. Yes, falling off the sofa. I love Clare and Phil’s house on the show. It is so comfortable and beautiful all at the same time. And then I noticed their cabinets. Love, LOVE that color. So I started doing some scouting online. Apparently I’m not the only one crazy about the color. These are the best pics and guess to the color (thanks to Reckless Bliss!).


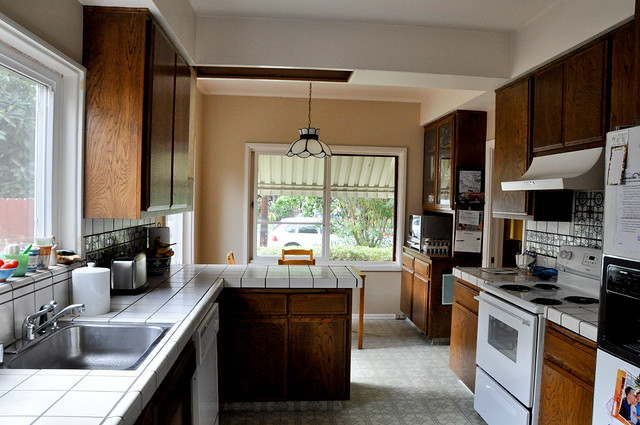
I’m just bad about this kind of stuff. What would this look like on the cabinets with our current tile (which is staying.)? What do you guys vote for? First a look at the kitchen again in its’ current state:

DSC_0002

And a little refresh of those colors on the table:

- all white
-a vintage, light green
-a cream, antique white
-this “straw” Modern Family color
-something completely different??

Ok…discuss.