Crafty Tuesday

I know, I know…don’t fall off your chair. We are back with a few crafts. The first craft is a little holiday-ish, but we had so much fun making it.

Of course we “borrowed” the idea from the lovely HowDoesShe? blog and I thought since our friends here in California wouldn’t have a white Christmas they really could use a little snow!

So we set about making some. Cornstarch, kosher salt and lots of glitter. We learned after the first batch that this is best mixed up OUTside.

DSC_0161

Of course, if you need to “make” snow where you live, it is probably nice enough to make the mess out in the courtyard.

DSC_0095

We packaged it up in empty paint cans (we got ours from Ganahl for a few bucks each) –

DSC_0169

Downloaded the label from HowDoesShe and added the paint can opener and a bow –

DSC_0170

And, voila! Fun little gifts that were so much fun to give.

And we brought out Eva and the heat press for a few other gifts to give as well.

A little (pink glitter!) princess tee for a sweet niece –

DSC_0797

And a new logo and some “work” shirts for Mom & Dad –

DSC_0800

DSC_0799

I’m antsy to get started on some other projects around here.

Of course, if you are following me on Instagram/Facebook you already know my newest passion…baking BREAD!

My first batch was for our New Year’s Eve dinner with our good friends. I got the recipe from King Arthur’s Flour and I used herbs de Provence and butter in between each “slab.” It was really pretty good.

DSC_0060

And then I decided that I was going to try my hand at sandwich bread since the girls headed back to school this week and would need lunches every day. The sandwich bread has been a huge hit.

photo

I love the fact that the bread is really only 4 or 5 ingredients. No high fructose corn syrups, no preservatives I can’t pronounce. It makes me feel better to have control over one small part of our every day eating.

Tonight I tried Kaiser rolls since we were having pulled pork sandwiches and I didn’t have any rolls. They were really good – nice and dense and able to withstand a big helping of meat.

DSC_0146

I’ve been using Nick Malieri’s Bread book. It is so easy to follow and has all kinds of other recipes. I’m sure the book and I will become great friends.

So that is a few things that have been going on around here. Tell me what great Christmas crafting you all did over our break?


Crafty Tuesday ~ Kitchen Edition.

At last. After what? Six months? Nine?

At last, I think I can call the kitchen finished. Or at least close enough to finished that I will not spend every waking moment thinking about painting, flooring or cabinet hardware. Before we see the finished project, let’s take a walk down memory lane, shall we?

The day we moved into the house…

Kitchen...

Most hideous kitchen, but most cutest model.

Kitchen

And it just gets better and better…

Eat-in kitchen area

Remember – the guy who owned our house before us was blind. Not that I needed to tell you that…you probably could’ve figured it out by that last pic. no?

So we took down the wallpaper, which made a difference. And we took down the cabinet that everyone hit their head on and that made a HUGE difference.

DSC_0002

We changed out the light fixture and then my birthday gifts arrived.

DSC_0012

And then the great floor debacle ran its course, but we ended up with lovely floors just the same.

And finally…I bit the bullet, picked some colors and painted up the cupboards, the walls, some family rules art and a chalkboard spice cupboard to use as our shopping list spot. And finally we have this…

DSC_0003

DSC_0004

DSC_0007

DSC_0015

DSC_0020

I can’t even tell you the difference in the lighting situation in the kitchen. It has SO MUCH LIGHT. It is awesome. I did include that last pic there so you can see the new back door – which helps a lot in the lighting situation!

The colors are not perfect in the photos, but here is the rundown on what is what.

Wall: Benjamin Moore Manchester Tan
Upper Cabs: Benjamin Moore Bleeker Beige
Lower Cabs: Benjamin Moore Alexandria Beige

(All three are just different shades from the same swatch family. If BMs site wasn’t being so difficult I’d try to put the paint colors up there…but, well, it is being difficult. So you can go check them out if you are interested.

The cabinet hardware we got from Lowe’s. It is the same oil-rubbed bronze as the light fixture and it brings out the brown in the grout (I hardly notice the old tile…in fact, I think I kinda like it now!) and the floor tile. And the paint colors have just enough gray in them that they look great next to the stainless steel appliances.

I think at some point we might want a little more color – but I have artwork and window treatments to find still and I figured I can pull in the blue from the tile into these. We also need to find a microwave/vent for over the range to get rid of that old hood. And I’d love to get a new faucet at some point, too.

But like I said…it is close enough to finished for me. And I’m sure for you all, too. So, NO MORE KITCHEN posts! Well…at least for a few months, ok?

Crafty Tuesday

Haaalllo there my crafty friends! We are trying to get back into the swing of summer projects after all the vacationing we have been doing. There’s some progress happening in the kitchen (as I sit here typing with my hair full of sanded bits from my ceiling) but nothing really that I can show. Maybe next week?

Last week, in my usual schizophrenic way, I decided that I couldn’t go another minute without fixing our outdoor furniture. Yes, I did have about six other irons in the fire, so to speak, but I got another splinter while we were eating dinner on Sunday. It was not my first splinter, so the outdoor furniture moved up on my list of to-dos.

When we got the furniture last year I waterproofed it right away, but an entire year baking in the hot California sun had made our furniture brittle and thirsty! When I had waterproofed it last year I really liked the darker initial color, so I decided to stain the furniture to get that color that had faded out…back.

After sanding everything down, I used the MinWax Wood Conditioner just to give the wood a little extra love. The wood conditioner is really easy to apply – it is thin and you just apply it with a paintbrush.

DSC_0009

It dries really quickly and you are supposed to apply your stain within 2 hours of the wood conditioner. So I broke out the stain. I used the MinWax Gel Stain in the Light Cherry stain. This too is very easy to apply – and the gel consistency means no drips, which is very good for me since I tend to be a messy painter/stainer!

DSC_0012

So I was very pleased with the color. I like that it has a little bit of teak/cherry redness to it and makes it pop out on the courtyard. BUT, I couldn’t leave it as is. We needed some polyurethane to protect the stain and wood. My new friend in the paint department at Ganahl Lumber assured me that I should use this marine polyurethane because it is the varnish they use on boats and it will last for a few years and I will not have to do this again next year. Sold.

DSC_0087

I’m not completely sold on the glossiness of the poly yet, though. I like the more matte/satin finishes generally, and this one is very shiny. But, I think it will dull down in just a few weeks in our hot sun and if it saves me a few days next year…I think I can live with the gloss.

DSC_0085

Anyone else had any adventures in outdoor staining lately?

Crafty Tuesday ~ House Edition

“For being a ‘STAY-at-home Mom’ – you are never, ever home!”

That is the greeting I got from my sister when I picked up the phone yesterday. I can’t really argue with her. Our start to summer has been just one big, long stream of to-dos. I think we are finally slowing down this…just in time to jet off to Chicago & Michigan for a vacation in a few days.

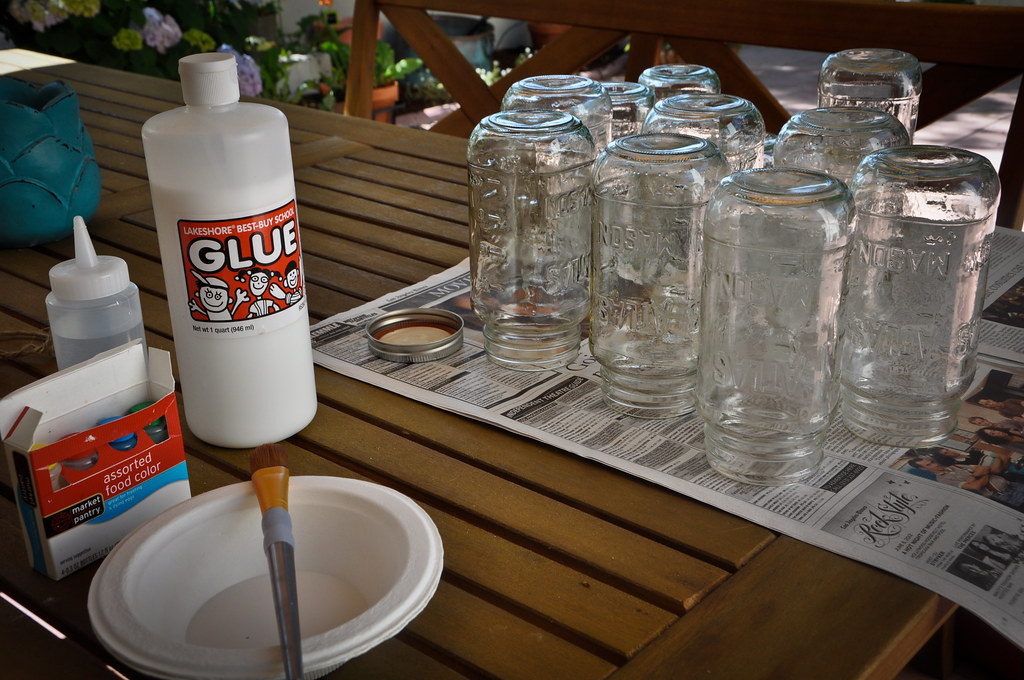
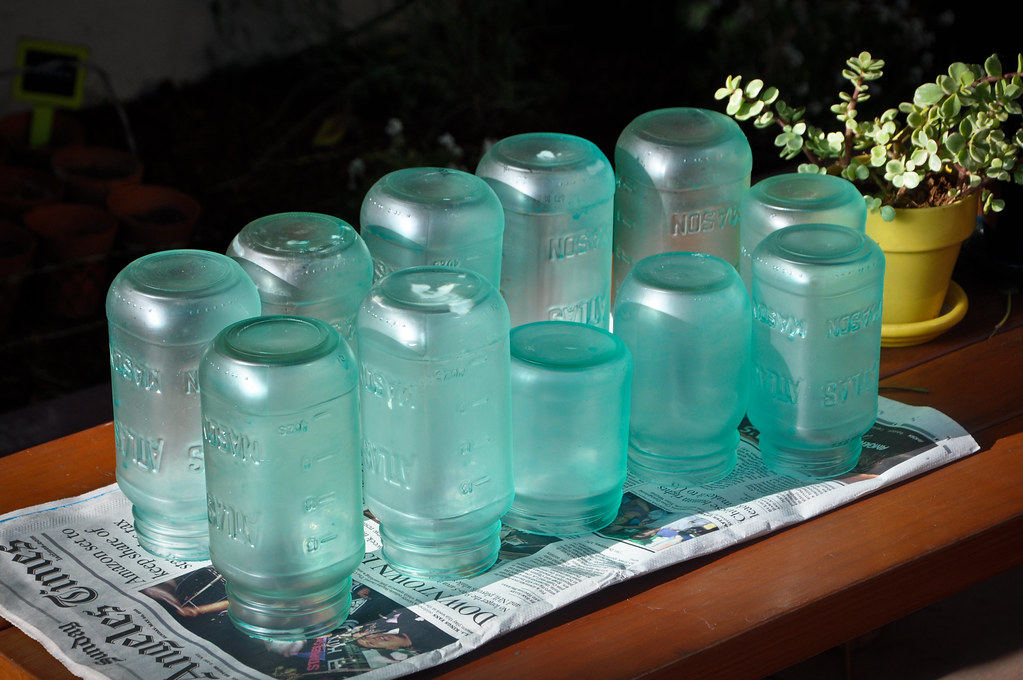
Before I go, I promise to update pics & vids of all of our recitals and excitement over the past 2-3 weeks. All of this activity has left very little time for any Crafting…but we have been trying very hard to get our house ready for summer. So while it isn’t so much crafty, there has been some decorating – or at least decisions – happening. Including some…wait for it…decisions and activity on the KITCHEN. Yes, indeed. My indecision has finally stepped (cautiously) aside and we have movement, people!

But first…I finally found a great outdoor rug for our patio. I found it when (and where) I wasn’t even looking for one. I’ve been eyeing one at Target that has been hanging out around $119-$129 price range, so I had planned on waiting for that clearance tag. Then I was walking out of Bed Bath & Beyond a few weeks ago, I happened upon this one that I like even better, on clearance for $75! And of course with that 20% coupon that is always floating around – we scored for $60 a nice new outdoor rug.

DSC_0062

I like that it is neutral enough that when we paint and I change my cushions the rug will fit right in.

Before a little June Birthdays party we had last week, J. also hung some cool outdoor party lights for me. I have a few more strands to zig-zag over the patio…

DSC_0064

I like them so much, I think they are going to stay up. They are going to be perfect for dinner and drinks on the patio all summer long.

DSC_0038

NOW…on to the kitchen. Are you guys all sick of hearing about this kitchen yet? I’m 100% certain poor J. is. And I think he is completely exasperated with me, too.

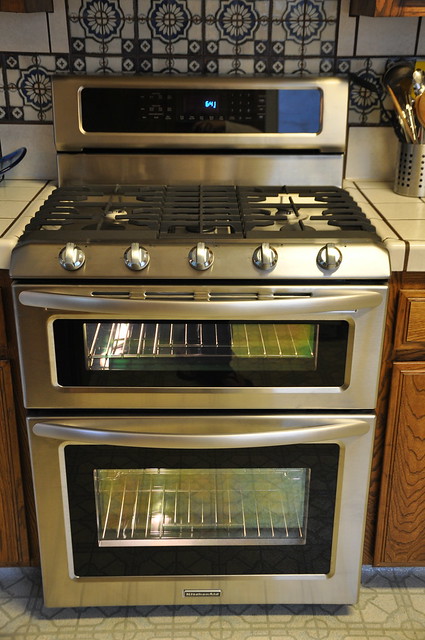
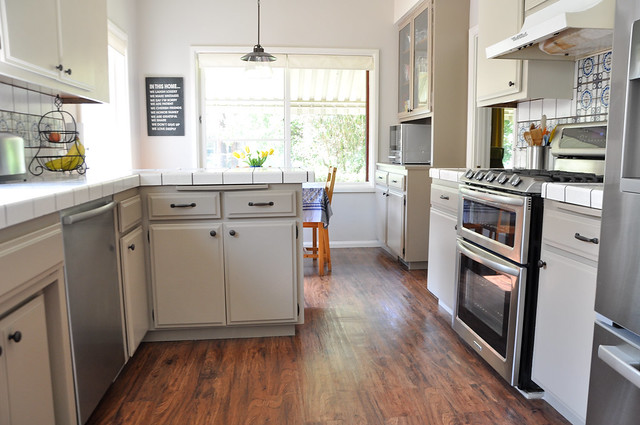
When our kitchen saga began I was certain that I wanted white appliances. J. wanted stainless steel. I was not convinced. After months of shopping for appliances I said to J, “You know I kind of like the stainless steel look. I think it might work.” J. just rolled his eyes at me. (And we got stainless steel appliances.)

When we started looking at flooring, J. pipes up with “I like the wood floor look.” Oh. No. I was insistent that we could never do that – we have real hard wood floors throughout the entire house, we can’t match it and it would just look weird. No. Absolutely not.

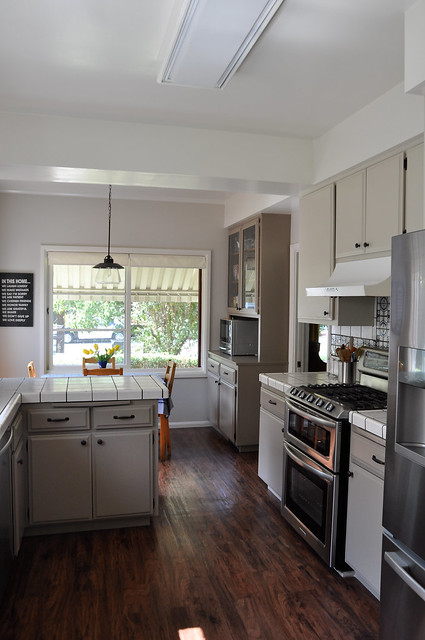
Um. Yeah. About a month ago I *found* this great porcelain tile that…looks like wood planks. It is definitely different than our hard wood, and is dark and looks like the wood beams we have running through the living and dining room. Guess what we are doing on the kitchen floor? (Ignore crap phone photo! Soon I’ll have real photos!!)

photo(1)

The poor man. But, he has been dealing with me and my whims for over 20+ years now. I think he has probably learned, just give me a few minutes (weeks, months…), I’ll come around to most things. I just need to work it all out in my little brain.

Anyhow – the flooring is tile…and so cool. And yes, we are going to have it laid out in a herringbone pattern like that. It will have definite differentiation and will be kinda awesome, I think.

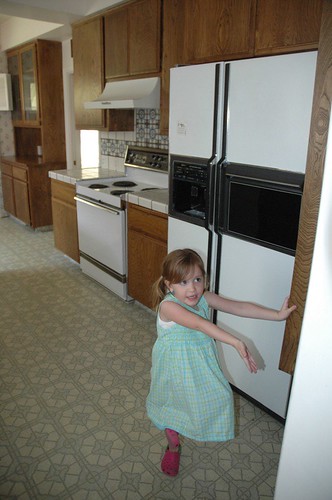
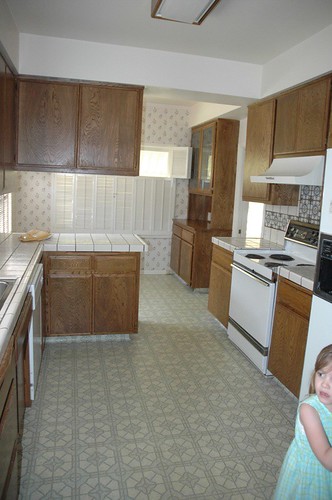
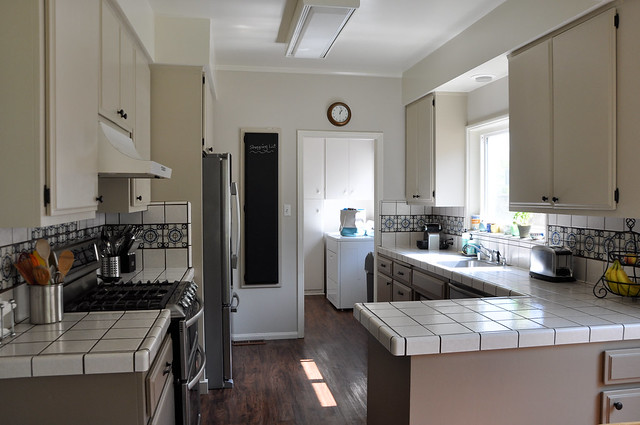
Meanwhile, to refresh your memory. Our kitchen yesterday morning –

DSC_0056

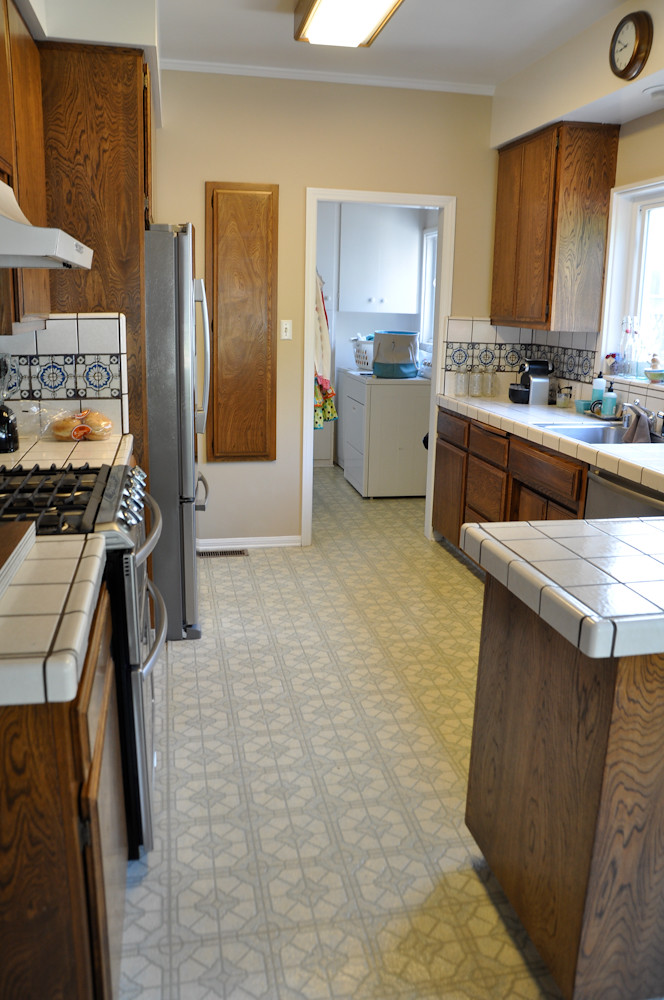
Our kitchen around noon-ish –

DSC_0060

(Hi Robert & Henry! Thank you, thank you, thank you for wrestling with the 40+ year old glue and vinyl. Man…it did not look fun.)

And our kitchen last night after they left –

DSC_0066

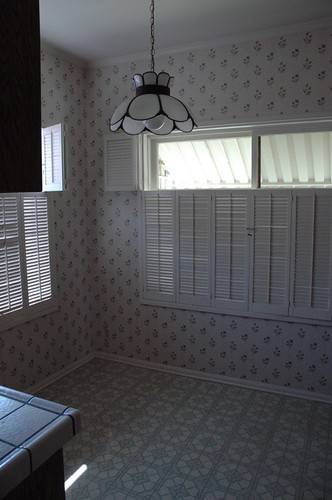
It already looks better! 😉 And will you please note that I DID (mostly to make up for my stubbornness!) finally hang some shades in the breakfast nook for J. It was a compromise of sorts – I was not going to put those horrible shutters back up, J. was not going to let me not do anything…so in the meantime I found simple roman shades at Lowe’s. I might have to va-voom them up with some trim or fabric once we get colors sorted out.

And now – it is imperative that we paint the cabinets. I mean, it was before, but in a few days we are going to have dark wood floors, so I think it will speed up the need for paint when I see all that wood in there.

I had my design posse come over for lunch a few weeks ago and we all came up with these two colors:

Screen shot 2012-06-18 at 9.36.08 PM

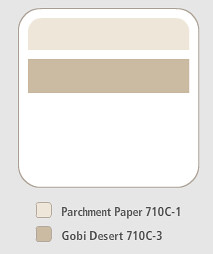
Except I’m going to match it to Benjamin Moore colors…we had a Behr color deck to use, but I’ve really fallen in love with BM paint. It is exceptional and I get $5 off coupons from them regularly.

We are thinking the lighter parchment color (which is just a shade darker & a little creamier/browner than our trim color) for all of the upper cabinets and the gobi color for the lower cabinets. That way we don’t have a whole lot of white/cream with all of the cabinets + the tile countertop going on. But it will be a nice progression with the lighter color on top blending with the tile and drawing your eye down to the floor -and the dark colors on bottom for a nice grounding. I’m so excited – and just a wee bit relieved – ok, a lot relieved! I’m ready to paint…now!

But I fear it will have to wait til Robert finishes the floor, which will be just in time to leave for our vacation, which means…by the end of summer it might be kinda finished?

Crafty Tuesday ~ Gifts Edition

Eva strikes again.

I am certain by now you know of my love for our Silhouette machine. Look what a little vinyl did for these teacher end-of-year gifts. Instant personalized cups for summer!

DSC_0397

And…I saw some family tree prints with the little birds (for each birdie in the family!) awhile ago and decided that I wanted to tackle family trees too…only doing it as canvas/painted art. With THREE best girls with June birthdays, I decided this was the craft to try. With only a minor set-back, I think they turned out pretty good.

DSC_0434

I started with some square blank canvases (thanks to Hobby Lobby!), and painted them a base color – the color I wanted the trees to be – not the major color.

DSC_0427

And then I cut out the tree & birds with Eva and adhered it onto the canvas.

DSC_0429

This is a good way to use up bits and scraps of odd colored vinyl, since you are not really using the applique. I used outdoor vinyl, because it is what we had. It is however, very hard to make sure the edges are really applied well on the canvas. I tried to smooth it down while I pressed on the back of the canvas to make sure it was adhered. (This will become important in a minute or two…)

Then…paint your overall color over the top of the vinyl.

DSC_0431

(Yes, sorry about switching paintings on you…same steps, different tree and colors!)

Let dry, and peel the vinyl up. You *should* see your object outlined and colored in the color that you put down first.

DSC_0432

And it DID work, but since I didn’t get all of my edges all pressed down perfectly, my tree and birds were kind of jaggy. So I ended up repainting the tree by hand to get it nice and smooth and neat. But at least I had a good outline to follow and didn’t have to freehand it.

The text, on the other hand, did not fare so well. So I ended up cutting the text out of vinyl again and just using the text instead of the paint trick.

DSC_0433

There was no way I was getting nicely printed text from my paintbrush. It worked just as well.

DSC_0436

I think they were liked by all, and I can’t wait to make one for us for our new kitchen.

DSC_0435

Crafty Tuesday ~ Outdoor Edition

Hello, Crafty Peeps!

Once again I feel like the only time I get a second to pop into my poor neglected blog is it to put up a Snapshot or post a CT. Last week was no exception. We are hitting the end-of-school-year crunch, T-12 days and counting around here before it is SUMMER time! We have seemed to skip the chilly May days, and there doesn’t appear to be any June gloom on the horizon either. It has been hot, and summer-y already, so we have been spending lots o’ time out-the-doors! I’m desperate to get our outside looking live-able, especially since I’m still stuck in a holding pattern on a lot of INside decisions.

Addie and I have been weeding, planting and gardening away – we even harvested a few tomatoes that the critters didn’t get to yet for our Sunday dinner. I’ve sort of become obsessed with vintage-looking outdoor stuff. I got this pot last summer to keep our hose in – I love the green rustic patina finish on it.

DSC_0018

Many, many years ago – I found this old wire potting holder at a flea market. It really hasn’t been given the proper love or attention all this time, so we brought it back out and are putting her to good use, too.

DSC_0022

(Looks like our herbs could use a little drink, Addikins!)

When Birdie #2 and I were shopping a few weeks ago I found this planter that I LOVE, and it fit in with the sort of vintage-y vibe – in that lovely green color – so I snapped it up. (Thank you, HomeGoods!)

DSC_0010

And when I was shopping for something totally unrelated at Orchard Supply last week, I spotted this old box-turned-planter.

DSC_0006

Now there is NO love lost between me and petunias – especially pink petunias – but the box…oh, I loved this box. So I used my birthday money to make a bit of a snap purchase. I figure sooner or later those pink petunias will be history and I can plant something I really love in that awesome box. (It also fits in our outdoor fireplace perfectly!)

DSC_0008

One thing I have been seeing everywhere and dying to create are these mason jar lanterns. You can see the PotteryBarn ones run almost $8 a pop…I’ve found them elsewhere for a little cheaper, but I want a whole bunch of them…and I don’t want to spend a whole bunch of money! AND…I just happen to have a lot of old jars (I knew I was keeping them for something!) lying around. So to make them look like the old vintage jars, I used this tutorial and got to work.

DSC_0003

I love the blue she used for her jars, and I’m truly a sucker for those old blue jars, but I wanted a little more green feel to mine. So I used her recipe, 1 tsp. glue, 1 1/2 tsp. water and two drops of blue coloring and added one drop of green. Brush it on and let dry…

DSC_0019

Perfect color. I did get a few streaks, but I figure once the sand and candles get in there, we are going to be just fine. I did try to fashion some wire “hangers” out of…wait for it….old wire hangers. But they are not flexible enough and I can’t get a close enough fit. So I’m on the hunt for some different wire.

To be continued…

Crafty Tuesday

I didn’t do too terribly much crafting around here last week, but I managed to get one little project for me, off of the list.

I have wanted to vinyl-up some of these jars for a long time. Birdie #2 and I made the monthly pilgrimage to the mecca (Hobby Lobby) last week and all of the glassware was 50% off, so perfect time to stock up on jars.

And then we just cut some tags out with outdoor vinyl (so we can wash the jars!) and one project done!

DSC_0486

I hadn’t washed them yet, so that is why they are still hanging out on my table, but they look cool, huh?

Now the girls were plenty crafty for Mother’s Day. This is what Addie gave me on Sunday (well, Saturday night because they couldn’t wait!) –

DSC_0490

And inside the bag was a silhouette her teacher did –

DSC_0489

I put it in a frame so I can hang it, and I also took a photo of Em yesterday so I can do one of her. I love these! And the silhouette really does look like Ad’s profile.

And Em brought home a handmade gift, too – my most favorite gifts in the world.

DSC_0491

And a close-up of the letter than accompanied the coupons –

DSC_0493

“A multi-tasker and classy.” That is what I am to my girl. Eh. I’ll take it.

And the other present they brought out, although it isn’t handmade or crafty –

DSC_0496

It does make rockin’ ice cream. I think we are going to have some fun coming up with our own homemade treats!

Any Mother’s Day craft goodness that you can share today?

Crafty Tuesday ~ The Rest of the HP Story

Okay. So we had a lot of last minute craftiness going on last week. And when I say “last minute,” I mean we were literally crafting up to the very last minute before kids starting arriving for Em’s party on Saturday.

So you saw the invite last week. When the kids arrived to “Kings Cross” to find platform 9 3/4, they found this…

DSC_0373

If you’ve read the HP books, you know that the witches & wizards must run into the wall between platform 9 & 10 at the train station (platform 9 3/4) and they will magically be transported into the other world. So we set up a “fake wall” that the the Hogwarts’ students could “run into.” The brick fabric is gossamer that I got from this place. I had intended on putting it all over the dining room and hallway to turn it into a castle. But, I ran out of time…and realized that our house, with the brick and stucco walls was close enough to a “castle” for a 9-year old’s party!

Once all of the guest arrived, we had a sorting ceremony where all of the kids put on the sorting hat and pulled out a card telling them which house they had been placed into. I just made up cards for Gryffindor, Ravenclaw and Hufflepuff because Em was adamant that none of her friend would want to be a Slytherin. Our lovely Professor McGonnagal (Audrey’s older sis, Yvette) helped “sort.”

DSC_0358

Addie was so excited to be a Gryffindor!

DSC_0351

Then each student got to pick a wand.

DSC_0325

J. and I made wands using this tutorial. And we also handed out their textbook – which was full of the most crucial Harry Potter spells…

DSC_0456

and some potions and ingredients…

DSC_0458

I found a similar book and copied the idea. I collected the pieces, laid the booklet out in InDesign, printed it on fake parchment paper and then just “bound” it together with some twine. It was a huge hit. As we were walking to school this morning one of the kids ran past and tried to cast a spell on Em. Apparently we turned out some pretty good students in our short little day together.

Once we had our supplies and were sorted into houses, the students got their schedules for the day.

DSC_0453

Then they were off to class. In Prof. McGonnagall’s Transfiguration class they practiced casting spells. Then each of them were “transformed” into a character from Harry Potter. They had to ask their classmates questions to try to figure out who they had been turned into.

DSC_0384

And then they moved onto Herbology with Professor Sprout. There they learned about an important potion ingredient, and planted some ginger. (It was the weirdest plant/seed/root I could find for them to plant!)

DSC_0372

And finally, they went to everyone’s favorite class, Potions with Professor Snape. We had the most fun coming up with all of the potions.

DSC_0340

All of the potion ingredients were edible. Not necessarily delicious…but edible! We had a lot of gatorade, lime drink, strawberry syrup, dark syrup, coconut, cherry juice, pixie sticks…oh, and POP ROCKS!

DSC_0316

A few of the bottles I borrowed from friends, but most of these bottles I have collected over time. I used labels from DreamLoft on Etsy and just added text in Illustrator and printed them on adhesive backed paper so they were like real labels.

DSC_0315

Most of the kids actually tried their potions. Although, I’m not sure I would! They were all very pretty and colorful, but I’m certain didn’t taste as pretty as they looked!

DSC_0380

(Charlie came straight from a baseball game, so he was a little smudge-y!)

After classes, there was a final exam (it wouldn’t be school without a test, right?!) which I am pleased to report ALL students passed.

DSC_0388

And then we had ButterBeer (delicious recipe here!) back in the Great Hall…

DSC_0430

And Cauldron Cakes…(cupcakes dipped in chocolate with caramel – gold – frosting!)

DSC_0342

And, to top it all off? A little bit more sugar. We re-created the Honeydukes Sweet Shoppe that the characters in the books visit on their Saturday trips to Hogsmeade.

DSC_0338

The students got to “shop” and fill their goody bags to take home. (Again with the label paper. I printed out the Honeydukes logo and we stuck them onto small white craft bags.)

DSC_0330

Of course we had chocolate frogs…

DSC_0331

And Bertie Bott’s…

DSC_0339

We also had Acid Pops, Fillabuster’s Fizzes, Professor Sprout’s Magic Mushrooms and Dumbledore’s lemon drops!

It was a little too hot for a quidditch match, so we finished with a little viewing of Harry Potter and the Sorcerer’s Stone. The planning and execution of the party was so much work, but so very fun. All of Em’s friends are so sweet and ensured me that it was the “best Harry Potter party ever!” And that made the birthday party hangover on Sunday, all worthwhile.

DSC_0449

Crafty Tuesday

If you ever need to put together a Harry Potter party…stick around. I have been buried in the ol’ internets the last few weeks, culling ideas for Em’s party this Saturday. First craft on deck – the invitation. I found this cool “owl delivered invitation” on Pinterest and couldn’t find the source, or the original creator of the invite. I’m embarrassed to admit, I became a bit obsessed about these adorable balloons. I even googled “owl balloons” until it dawned on me. “Uh? Ohhhhh….it is just a white balloon with the owl drawn on it with Sharpie markers.”

Ahem. Yes. So…we got to work.

We started with an invitation that ripped off the acceptance letter to Hogwarts printed on some tan paper.

DSC_0002

I wanted it to look old, weathered and parchment like, so after I printed them out I tried to use some vinegar and was about to bake it when I realized that it was just smearing the ink and making me crazy. I couldn’t “parchment” the paper up first – because then it wouldn’t go through the printer.

DSC_0005

So I crumbled them up and started to wander through the my craft bins for something that would help age the paper.

DSC_0004

Score! My parents got me this distressing kit that I had forgotten about. It has a little brown chalk pad that is perfect for rubbing over the wrinkled paper and makes it look perfectly aged.

DSC_0009

And then I burned the edges a little bit to make them look officially old.

DSC_0011

And rolled the scrolls and tied each to an owl balloon. All of the owls here are just waiting to deliver their invites…

DSC_0015

We even got an owl rsvp back!

DSC_0018

NOW…on to the list of other crafts that have to be done by Saturday’s party.

Crafty Tuesday ~ All Things Birthday.

So, it was a little someone’s birthday around here. And you know how we love to do it up on our Birthdays in our house. It gave me a few opportunities to break out Eva and make some tees…

Our traditional “number” t-shirt to wear on birthday day:

DSC_0158

Next year we will have to get a bigger shirt, big enough for 2 numbers. (sigh)

DSC_0177

Birdie #2 and I are a little bit obsessed with the British “Keep Calm & Carry On” signs, (or anything British, really) so when I saw these being knocked off, I had to make a volleyball one for Em:

DSC_0150

And for Easter we made carrot whoopee pies. It was a mix I found at Target, but the packaging was so stinkin’ cute, I couldn’t walk away. I mean, look at it!:

DSC_0178

They were ok. And then Em decided for her “treat” to give her classmates, she wanted to do whoopee pies as well, except in chocolate. Seemed easy enough, I mean…easier than the cakepops, right?

While I was reading the recipe, I realized they were just using a cookie sheet to make the “cake part” of the pies. Now, thanks to JB, I do own a lovely whoopee pie pan, but it only makes 6 pies at a time. I needed 36! So I decided to try the cookie sheet to speed things along. Epic fail. So worth the extra time it takes to make the pies in the proper pan – or buy a second pan, I suppose.

Not that they tasted bad, but those irregular blobs that didn’t quite puff up like they were supposed to kinda grated on my perfectionist sensibilities. I mean look at these:

DSC_0179

And now look how pretty these are:

DSC_0180

See? At any rate, the pies were finished and delivered to school to the delight of all the third-graders (and a few choice first-graders, too!):

DSC_0183

And I’m sure the kids didn’t get my pun, but I liked it and I guess that anything to keep Mama happy when she is covered in flour and frosting is good:

DSC_0184

And the birthday girl enjoyed them, so that is really all that matters:

DSC_0197